Hi Everyone,My eight year old is learning to embroider. Her first project was embroidered bookmark which she did with two basic stitches. Here we are with another project embroidered coaster with only one basic stitch – tent stitch.


Materials needed:
1. Plastic Canvas (affiliation link)
2. Tapestry thread
3. Needle
Method:
1. Thread your needle. Put a knot at the end of the thread.
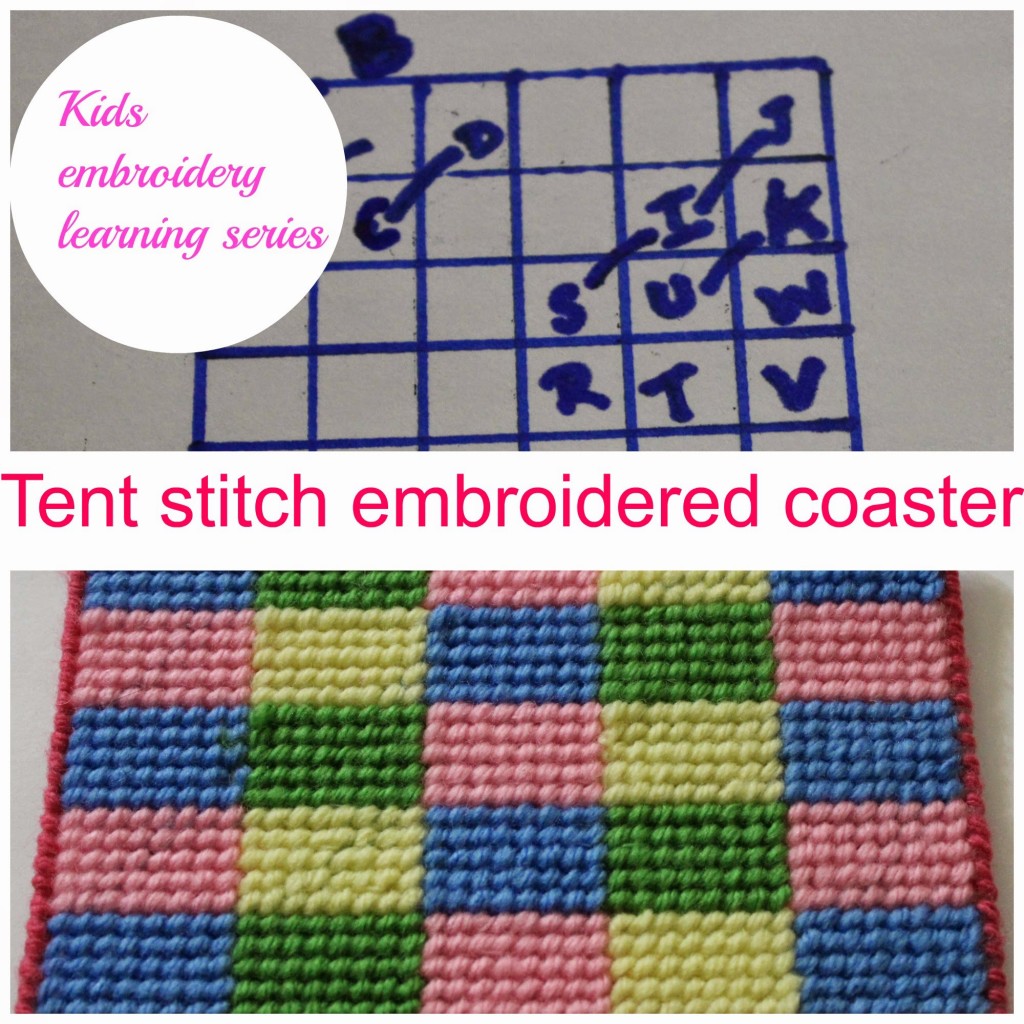
2. Tent stitch is a very simple stitch. I have tried to explain with a diagram. Pull your needle through hole A from the backside of the canvas. Move your needle over and up one space, insert it at B and pull through to the back of the canvas.
3. Bring the needle to one space down at C and pull to the front. Again one space up, insert it at D and pull through to the back of the canvas. Diagonal stitches are formed.
4. Continue the procedure till J. Once you finished your first row, bring the needle to the front through K
5. Turn the canvas upside down so that the first row stitches are at the bottom.
6. Continue the steps from 2 to 5 to complete the entire canvas. To know more about tent stitch, please check this out.
7. As long as you turn your canvas upside down at the end of each row, you can continue to work all the rows of stitches in the same direction.
8. Whipstitch the coaster edges for neater finish. At each corner, you may need to make 2 or 3 stitches into the same hole so that the plastic won’t show.
My daughter spent around 3 days of her free time on this. She was happy about how the coaster had turned out.
Thank you for reading the post. You may be interested in reading our Embroidered bookmark or Crochet simple flower.
If you found this post useful, pin it or share it! It will keep me motivated. Thank you!

That’s a nice coaster..good learning kiddo 🙂