One afternoon when my daughter asked for a project, I thought of doing a watercolor project as I had not planned anything. Watercolor projects give satisfaction and do not require ample planning. But one painting led to another and in no time we started exploring various techniques.
Affiliation links are used.
Materials needed:
1.Watercolor paper
2.Crayola Washable Watercolors
3. Crayons
4. Glue
5. Salt
6.Sharpie Permanent Marker 
7. Glue
It all started with my daughter drawing a simple design in pencil and traced with crayons.
Then she painted with watercolor! It looked simple and beautiful. But she wanted to do something more with watercolor.
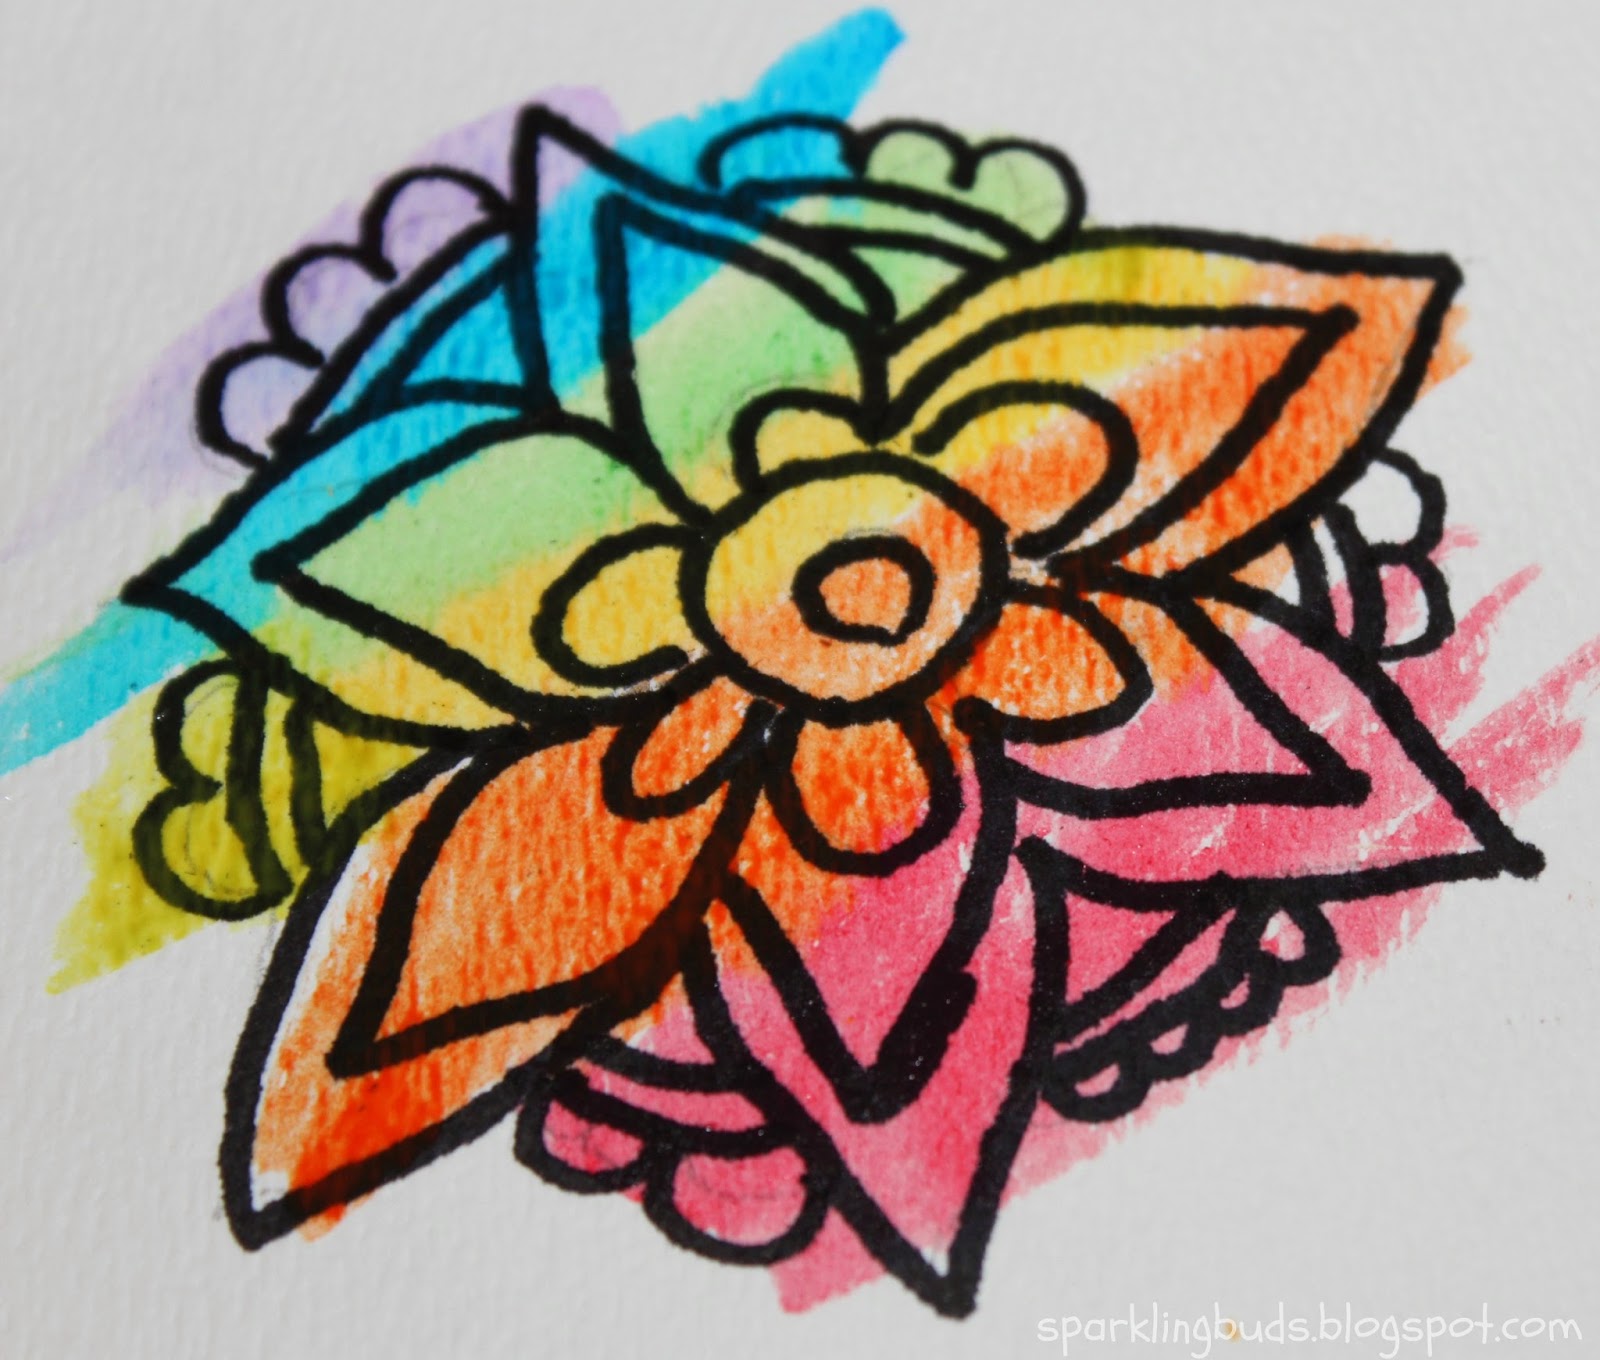
I asked her to draw the same design but instead of tracing with crayon, we used sharpie permanent marker.
The design turned into a beautiful piece of art after she applied watercolors!
As she wanted to explore more, she drew the same design again. This time she traced the design with white crayon and we did crayon resist.
The crayon resist fascinates my daughter every single time. She stops and admires her work when the art pops out!
When she wanted to continue, I thought why not we try watercolor silhouette.
I asked her to draw a very simple picture. She drew a flower. Then we applied water around the picture. Then painted with watercolor.
Beautiful silhouette was done! She changed the flower to butterfly as she felt it looked more like a butterfly.
As we both got hanged with exploring, we moved to the painting and sprinkling salt. This time she drew butterfly, applied water and then watercolors.
Immediately we applied salt and enjoyed the effect!
We moved to glue, watercolor and salt. She drew a design with glue, poured salt over it.
Removed the excess salt and touched the design with watercolors!
It was so therapeutic that we started sharing our past experiences. We had to stop as my toddler woke up. We both enjoyed painting and sharing!
We loved silhouette the best. We both liked it so much that we are planning to do simple silhouette watercolor project.
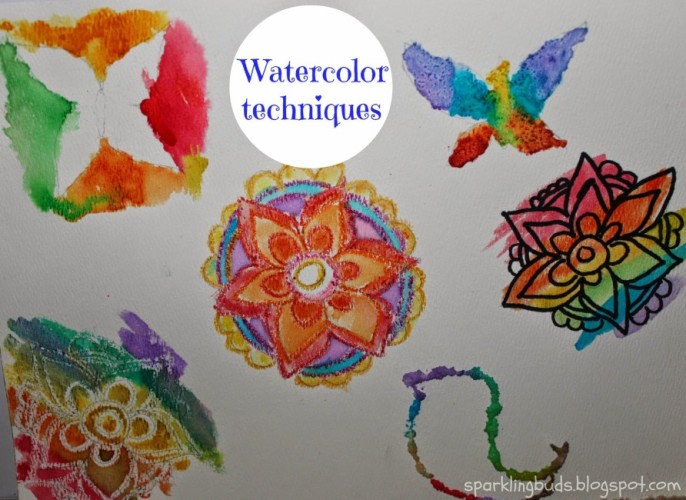
This is how the paper looked after our session. What do you think? Which one do you like?
Thanks for reading the post! You may be interested in progressive watercolor technique and wet on wet watercolor technique
If you found this post useful, pin it or share it! It will keep me motivated. Thank you!


Lots and lots of water color techniques. Each and every method give amazing outcome.
Thanks for sharing dear…
Thanks Muhil for your comments!
wow! a simple wow would not be very much enough of wat you have done here! 🙂 I have something to plan for my daughter’s boring time! she loves painting these days… coffee painting and yellow painting (i use turmeric powder for this) are her fav’s. there is a untouched water color kit at home! we will start doing this over the weekend!
Dhiyana – one question, instead of water color paper, can i use normal paper?? or a chart paper..? will it yeild the same results, or the paper would turn soggy?
Love to Dheekshu & Shammu!! 🙂
Thanks for your comments Suba!
Normal paper will work too. But watercolor paper is thick that I can tolerate more water than normal paper. We started with normal paper only but have never tried chart paper. Please pass me the information if you try chart paper 🙂