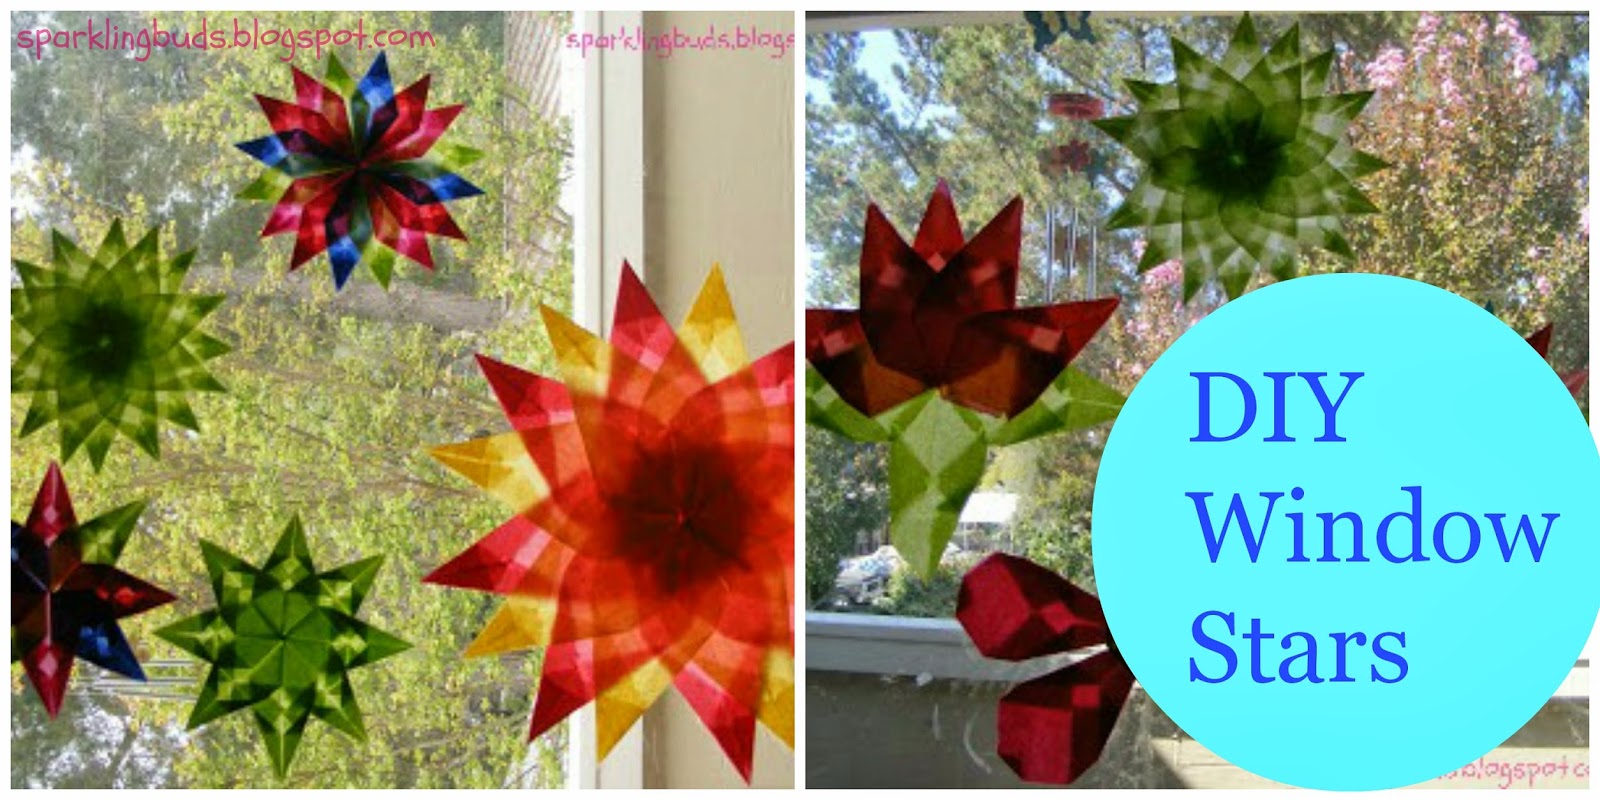
Hi Everyone,
Flashback Friday is a series of posts from my other blog https://dheekshu.blogspot.com. This post is a combination of two posts written on dates April 12, 2013 and September 24, 2013. I got the instructions for a basic star from a paper craft book. Sorry, I forgot the name of the book. We created other stars by slightly changing the procedure.
The procedure was easy for my daughter. She was very proud of her creation and gifted few for her friends too!
Materials Needed :
1. Tissue paper
2. Glue
Method :
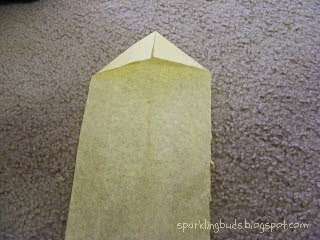
Step 1: Take a rectangular tissue paper.
Note: The original size of the tissue paper was 20*20 inches. We folded and cut 10*10 inches squares from that. Again folded and cut 5*10 rectangles. This way we were able to create same size rectangle easily. We need 8 such rectangles for a basic star and 16 for sixteen sided star.

Step 2: Fold the paper lengthwise in half. Crease.

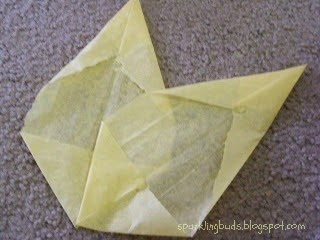
Step 3: Open the paper and bring one of the corners to the center.

Step 4: Bring the other corner of the same side to the center.
Step 5: Repeat step 3 and step 4 for the opposite side.
Step 6: Bring the corners again to the center for one of the sides. Now we have a paper that has 2 folding at one side and and one folding at the another side.

Step 7: We have completed one side of the star! We will call it a petal (petal for star?). We need 8 such petals for a basic star and 16 for 16 sided.
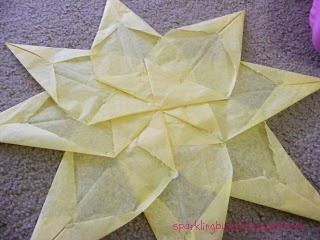
Step 8 : Have to glue single folded sides together to make the star. Position the petals along the creases. The side of one of the petals should touch the center crease of the another one meeting at the corner. Refer the picture below.
Step 9: Repeat the same for all the eight petals. For the eighth petal, have one side on the top of seventh petal and tuck another side on the bottom of the first petal.

Step 10: Basic star is done.
Optional steps for the 16 sided star
Step 11: Glue a petal (we used different color which is optional) meeting center creases of any 2 petals in the 8 sided star.
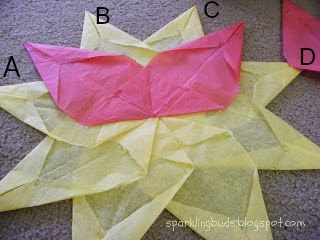
Step 12: We have to glue on alternate petals. In the picture below, we have pasted the first petal between A and B and second petal between C and D leaving the space between B and C.
Step 13: After 4 petals had been glued in this fashion, continue gluing 4 other petals on the left over spaces.

The beautiful star is done!
By changing the folding techniques, we can create different kinds of stars!
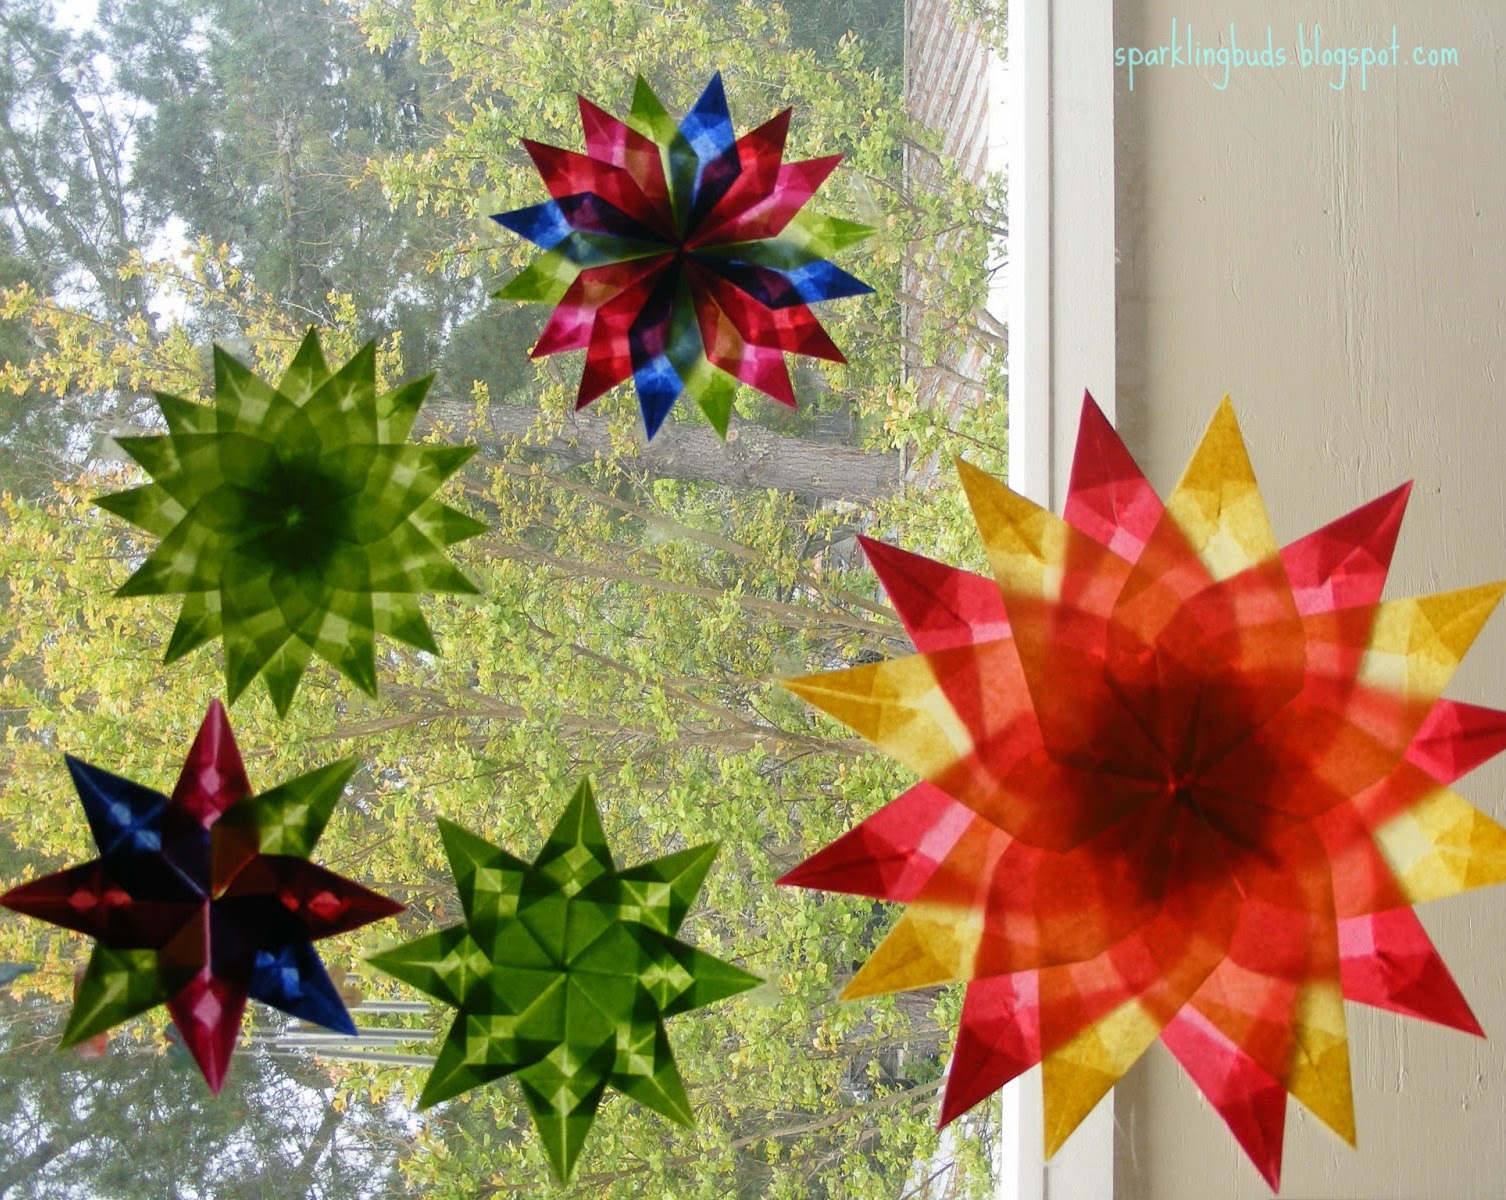
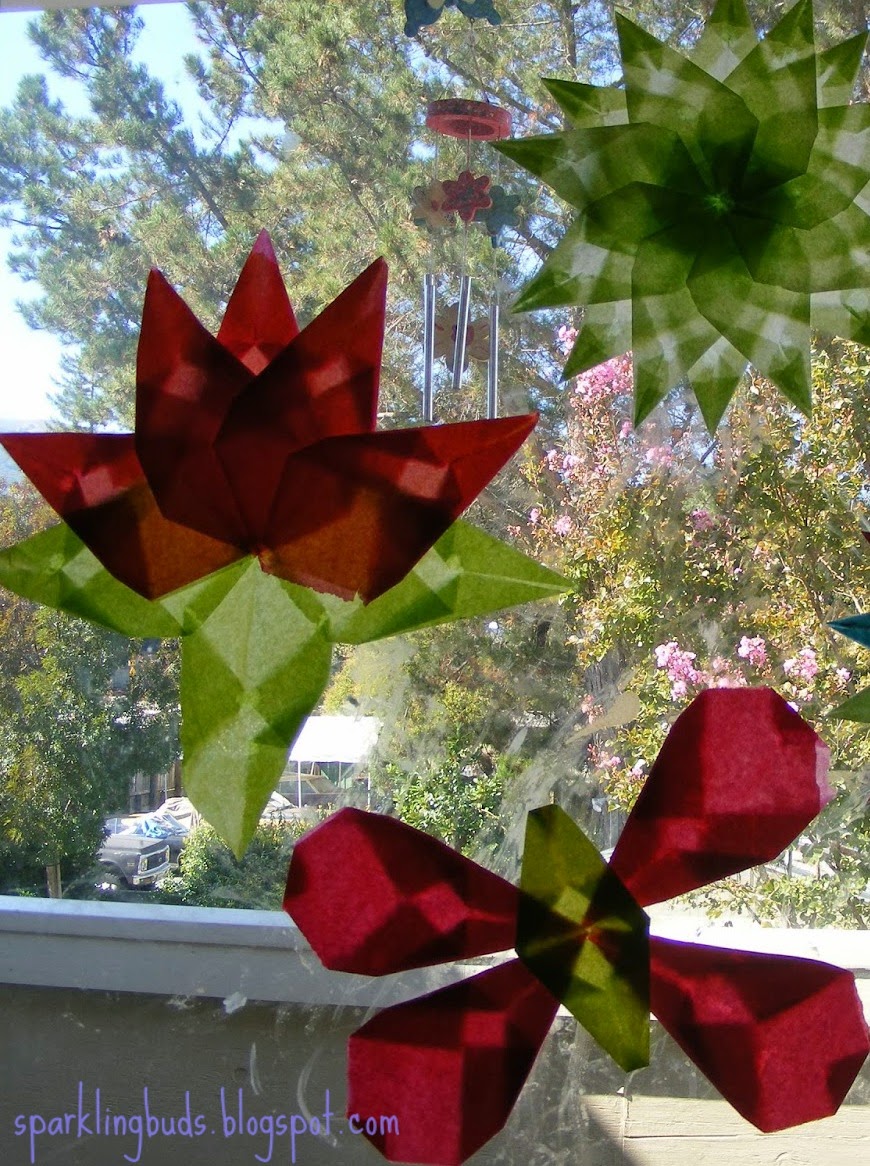
Surely it is an easy and satisfying craft activity for kids!
Thanks for stopping by! While you are here, you may be interested in our other DIY projects.

These are stunning! I want some for my windows!!!
Thanks Stephanie!
Perfect for welcoming Spring!
Yes Grace.. They are so beautiful and moreover very easy to make..
These are really amazing! Just pinned!
Thanks
These are beautiful! What a fun craft and lovely decorations!
Thanks Emma..
Gorgeous! Thanks for sharing at After School!
Oh wow! These are terrific!
Thank you for stopping by the Thoughtful Spot Weekly Blog Hop this week. We hope to see you drop by our neck of the woods next week!
Thank you all for your nice comments!