Hi Everyone,

In this technical solution series, let us focus on how to create our own dot to dot printable from any image available. You may be wondering why do we need to create one when lots of free sheets are available online. I prefer creating my own dot to dot printable for the following reasons :
1. I have the option to customize the printable. I can create based on the capability of the child. I can create one for my toddler from 1 to 5. I can create one for my 7 year using skip counting to teach the multiplication table. I can customize the font, size etc.
2. I can convert any picture in hand that suits our needs into dot to dot printable instead of searching the online ocean.
Okay, now let us get into the tutorial.
Materials Needed:
I used the free open office software Gimp for this tutorial but any software with layering option (eg. Photoshop) will work just fine.
Method:
1. Gimp is a free software. If you do not have one, please install from gimp downloads
2. Open Gimp and create a New Image by clicking File –> New
3. Choose the template as US-Letter and click OK.

4. I have chosen a simple circle figure to show as an example. You may not want to change the source image. So let us take a copy of the image to create the printable. Open the image which needs to be converted into printable by clicking File—>Open.
The image will open in a separate window. Copy the image by typing ctrl+c and paste it to the new template by ctrl+v

5. Now you will get the copy of the image in the new template. Close the source image without saving. That will ensure that the source image is not modified.
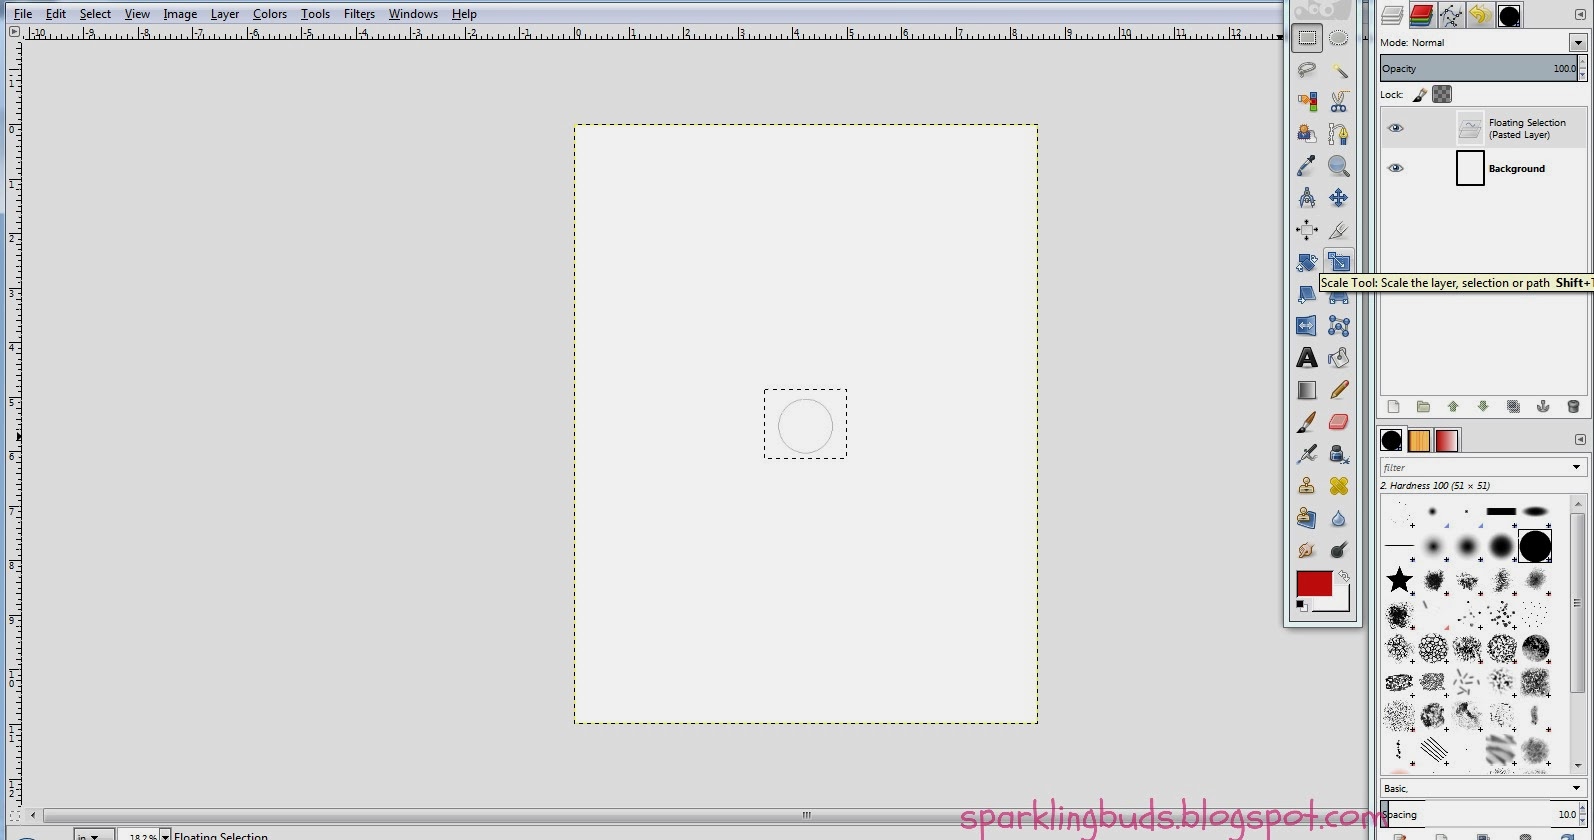
6. The copied image may need a scaling process to make it big. Choose the option scale from the tool box and click on the image. Resize the image by pulling the rectangular tab around the image. Click scale.

7. Right click in the layers window below Background. Click “To new layer”.

8. Again right click in the layers window below Background. This time choose option “New Layer”. Click OK in the pop up. A new layer will be created.

9. Choose Foreground and Background option from the toolbox. Choose a different foreground color rather than Black. This will be the color of the dots in the printable.

10. Click on Ink tool in the toolbox and circle from the brush window. Starting keeping dots on the image circle.

11. Now need to create numbers near the dots. Choose text tool from the tool box. Change font, size, color if required. Start drawing text boxes near the dots and name them from 1.

12. Once all the dots are named, click the eye near the “pasted layer” in the layer window. Refer the picture. Now only dots will be visible.

13. You are done! Pat yourself for your work.

14. Export the printable by File–>Export as. Export as a PNG file.

15. You can print the PNG file directly or use it as a picture in all other software.
Hope you find the tutorial useful. If you have any doubt or stuck somewhere, please let me know. I can help you out.
Happy printable creating!

Very interesting idea …
Thank you so much! I have been trying to find a way to do one with skip counting!