We add the watermark to the photos using the free online Photo Editor www.picmonkey.com
Option 1 is useful only when the watermark is used few times.
If we want to use the same watermark again and again, we may need to use this method. Here, we create the watermark once and reuse it.
It involves 2 steps.
Step 1 : Creation of watermark (One time)
Step 2 : Add the watermark created at step 1 to the pictures
Step 1: Creation of the watermark :
1. Go to www.picmonkey.com
2. Choose the option collage from the main screen. It may ask you to open a picture. You can use any picture as we are not going to use the picture anywhere.
3. Choose the option “Palette” from the side bar. Check “Transparent Background” box. Now a transparent background is created. Click on the Edit button on the top of the bar.
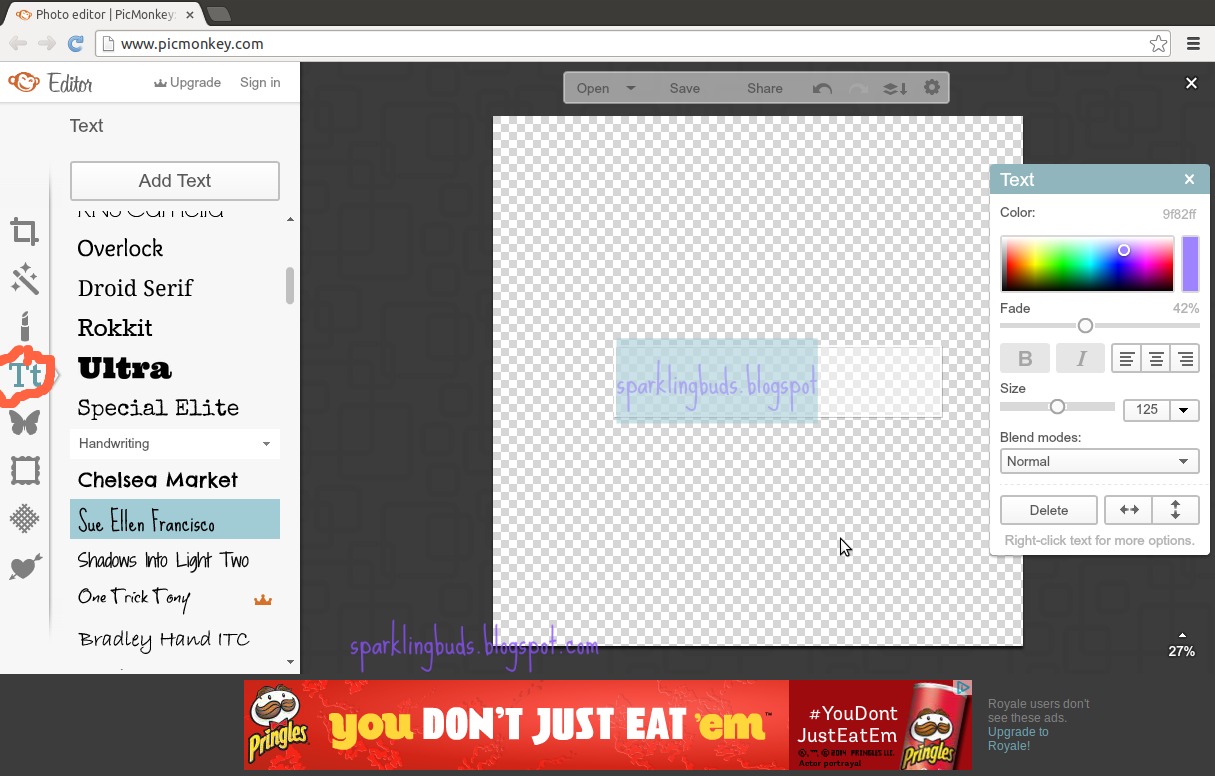
4. Now our transparent background is opened in the editor. It will not look like transparent for us though. Add the text box. Type the watermark. Change font, color and fade as you wish. Now the watermark is been created.
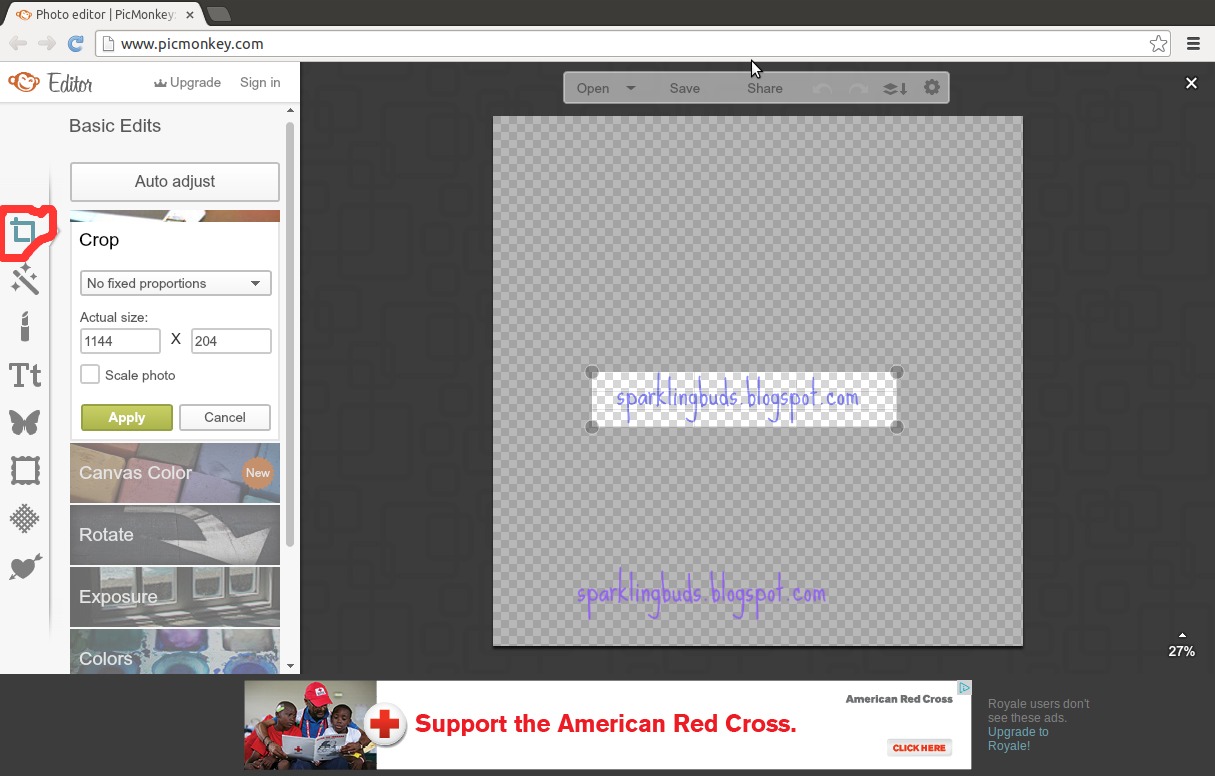
5. We will re size our canvas to the size of our watermark. Choose the Basic effect from the side bar and click on “Crop”. Adjust the window in such a way the watermark is covered. Apply the changes.
6. Now click on “Save” and save the watermark to the convenient location in the computer.
Step 2 : How to reuse the Watermark
1. Choose “Edit” from the front page and upload the picture to which the watermark had to be added
2. Click on the option overlay from the sidebar and choose “Own overlay” from the top of the screen
3. Choose the watermark from your computer, add and place it in the picture at the desired location.
You are done!
Though it seems to be a lengthy process, once we create the watermark we can reuse the same every time. This ensures that the watermark looks the same everywhere we use!
Hope you find the tutorial useful!

thanks Dhiyana
I created one for my English blog today.
Glad it worked for you!